Delicious Homemade Cherry Jelly Recipe: Sweeten Your Day Naturally!

Delicious Homemade Cherry Jelly Recipe: Sweeten Your Day Naturally!

Written by Jessica Lopez

8 REVIEWS | 4.5 AVERAGE

Published at 14-09-2023

Edited on 04/10/2025 | 09:24 AM

Baked-Goods Recipes

Course: Dessert

Cuisine: American Vintage

Difficulty: Moderate

Servings

10-12 slices

Prep Time

25 minutes

Cooking Time

35 minutes

Total Time

1 hour

Fat

0g

Protein

0g

Carbs

50g

Calories

200 kcal

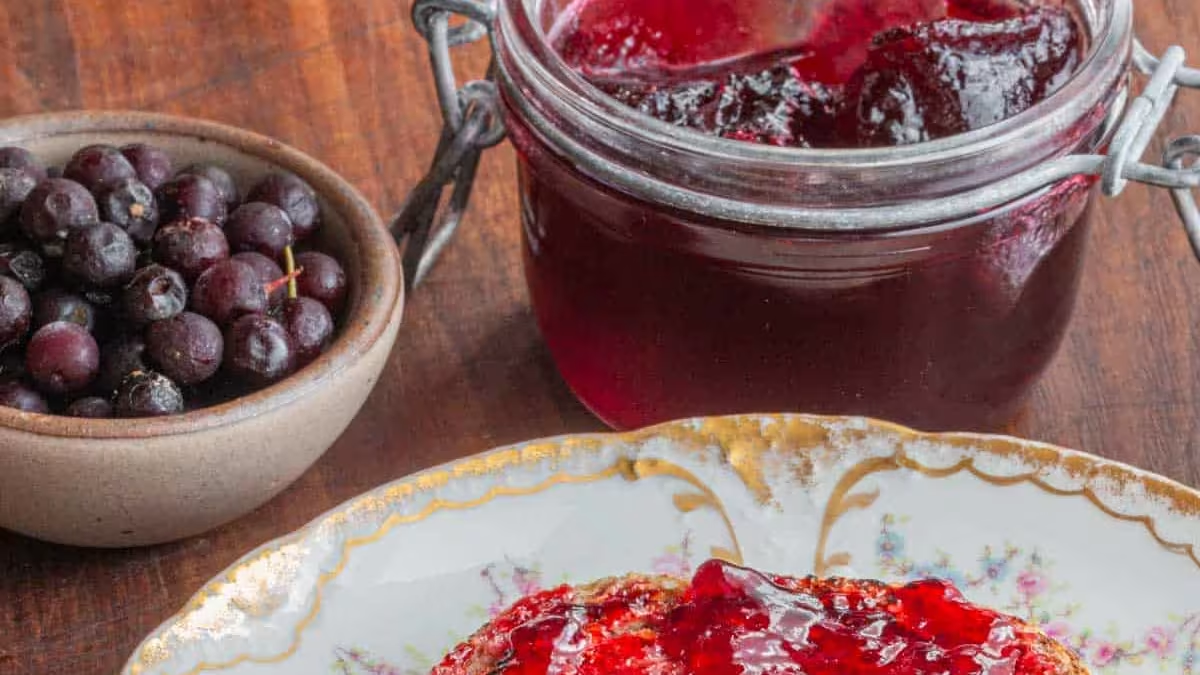
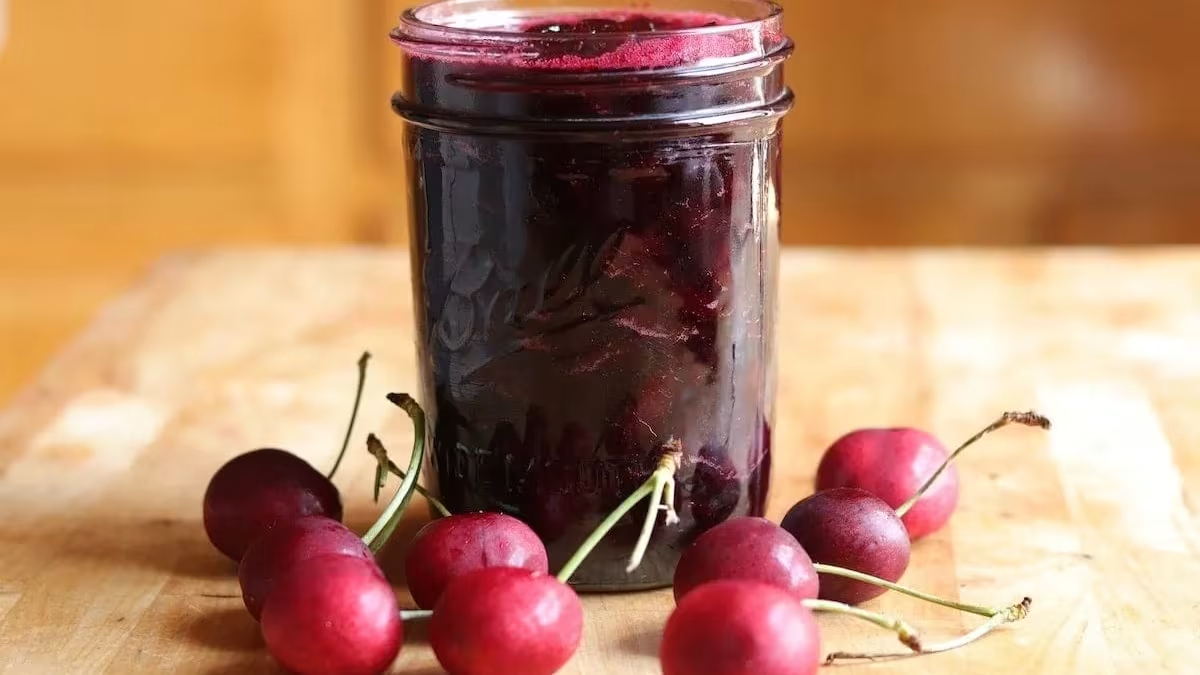
Welcome to the delightful world of homemade preserves, where the vibrant flavor of fresh cherries takes center stage! Our cherry jelly recipe is not just a treat for your taste buds but also a wonderful way to savor the essence of summer all year round. Made with plump, juicy cherries, this jelly captures the sweet and tangy notes of this beloved fruit, making it a perfect addition to your breakfast table or a thoughtful gift for friends and family. Whether you’re a seasoned canner or a curious beginner, you’ll find that this recipe is straightforward and rewarding. Cherry jelly is incredibly versatile; spread it on toast, swirl it into yogurt, or use it as a filling for pastries.

Imagine the joy of spreading this luscious, ruby-red jelly on warm biscuits or drizzling it over creamy cheesecake. Moreover, making your own cherry jelly allows you to control the sweetness and ingredients, ensuring a healthier option compared to store-bought varieties. With just a few simple ingredients and some patience, you can create a delightful jar of cherry goodness that’s perfect for any occasion.

So, gather your fresh cherries, and let’s embark on this sweet journey together! Your taste buds will thank you, and you’ll be amazed at how easy it is to make this delightful treat. Ready to impress your friends and family with your culinary skills? Let’s dive into this cherry jelly recipe that’s sure to become a favorite in your kitchen!.

Essential Ingredients of cherry jelly recipe

  • Fresh cherries: 4 cups, pitted

  • Granulated sugar: 5 cups

  • Water: 1 cup

  • Lemon juice: 1/4 cup

  • Pectin: 1 package

Measurement Units of cherry jelly recipe

  • 4 cups fresh or frozen cherries, pitted

  • 1 cup granulated sugar

  • 1/4 cup lemon juice (freshly squeezed)

  • 1 package (1.75 oz) fruit pectin (like Sure-Jell)

  • 1/2 teaspoon almond extract (optional)

  • 1/4 teaspoon salt

  • 1/2 cup water

Step by Step Instructions For cherry jelly recipe

Step by Step Instructions For cherry jelly recipe

  • Step - 1

    Begin by selecting fresh, ripe cherries for your jelly. Look for cherries that are vibrant in color and firm to the touch. Aim for about 4 cups of pitted cherries to ensure you have enough for a delicious batch of jelly.

  • Step - 2

    Wash the cherries thoroughly under cool running water to remove any dirt or residue. Remove the stems and pits using a cherry pitter or a small knife. This step is crucial as it ensures a smooth texture in your jelly without any unwanted bits.

  • Step - 3

    Next, place the pitted cherries in a large saucepan. Add 1 cup of water to the cherries, which will help to extract their juices when heated. Bring the mixture to a gentle boil over medium heat, stirring occasionally to prevent sticking.

  • Step - 4

    Once the cherries start to boil, reduce the heat and let them simmer for about 15-20 minutes. This will soften the fruit and release their natural juices. You should see a lovely deep red liquid forming as the cherries break down.

  • Step - 5

    After simmering, it's time to strain the cherry mixture. Use a fine mesh strainer or cheesecloth to separate the juice from the solid fruit. Press down gently with a spoon to extract as much juice as possible. You should have approximately 3 cups of cherry juice.

  • Step - 6

    In a clean saucepan, combine the cherry juice with 1/4 cup of lemon juice. The acidity from the lemon juice helps balance the sweetness and enhances the flavor of the jelly. Stir well to combine the juices evenly.

  • Step - 7

    Now, add 4 cups of granulated sugar to the juice mixture. Stir continuously over medium heat until the sugar is completely dissolved. This is a crucial step as undissolved sugar can lead to grainy jelly.

  • Step - 8

    Once the sugar is dissolved, bring the mixture to a full rolling boil. Boil for exactly 1 minute, stirring constantly. This step activates the pectin, which will help the jelly set properly. Make sure to keep an eye on it to prevent any overflow.

  • Step - 9

    After boiling, remove the saucepan from heat and skim off any foam that has formed on the surface. This will give your jelly a clear and beautiful appearance. Let the mixture sit for a couple of minutes to cool slightly before pouring it into jars.

  • Step - 10

    Finally, pour the hot cherry jelly into sterilized jars, leaving about 1/4 inch of headspace at the top. Seal the jars with lids while the jelly is still hot. Allow the jars to cool to room temperature before refrigerating. Your homemade cherry jelly is now ready to enjoy on toast, desserts, or as a delightful topping!

Additional Notes of cherry jelly recipe

  • When selecting cherries, opt for ripe, sweet ones for the best flavor. If using frozen cherries, ensure they are completely thawed and drained before use.

  • Sterilize your jars and lids before filling them with jelly to prevent spoilage. You can do this by boiling them in water for 10 minutes.

  • Be sure to measure your ingredients accurately. The ratio of fruit to sugar is crucial for achieving the right consistency and sweetness.

  • While cooking, stir the mixture gently but consistently to prevent it from sticking to the bottom of the pot. This will help avoid burning.

  • Once the jelly reaches a rolling boil, do not stir it. Allow it to boil for the specified time to ensure proper gelling.

  • Test for doneness by placing a spoonful of jelly on a cold plate. If it holds its shape after cooling for a minute, it’s ready to be jarred.

  • If you prefer a smoother jelly, you can strain the mixture through a fine mesh sieve after cooking to remove any pulp or bits of fruit.

  • Store the jelly in a cool, dark place. Once opened, keep it in the refrigerator and consume within a few weeks.

Special Equipment of cherry jelly recipe

  • Large saucepan

  • Canning jars and lids

  • Ladle

  • Candy thermometer

  • Jar lifter

Expert Chef Tips of cherry jelly recipe

  • Always choose fresh, ripe cherries for the best flavor. Look for shiny, plump cherries without blemishes.

  • Make sure to pit the cherries carefully; a cherry pitter makes this job easier and quicker.

  • For a vibrant color, add a splash of lemon juice. It enhances the taste and preserves the jelly's hue.

  • Use a candy thermometer to ensure your jelly reaches the right temperature for perfect set.

  • If you prefer a smoother texture, strain the cherry mixture through a fine mesh sieve before canning.

  • Sterilize your jars by boiling them to prevent spoilage and ensure your jelly lasts longer.

  • Label your jars with the date you made the jelly, so you can enjoy it at its best.

  • Experiment with flavor by adding spices like cinnamon or vanilla for a unique twist.

  • Store your jelly in a cool, dark place to extend its shelf life.

  • Don't rush the cooling process; let your jelly sit undisturbed to achieve the best consistency.

Ingredient Sourcing and Quality Tips of cherry jelly recipe

  • Cherries: Buy organic cherries if possible to avoid pesticides and ensure purity.

  • Sugar: Choose high-quality granulated sugar to enhance the sweetness without altering the flavor.

  • Pectin: Use a natural pectin for a healthier option; check labels for additives.

  • Lemon Juice: Freshly squeezed lemon juice provides a brighter taste than bottled.

  • Water: Always use filtered water for the best results, as tap water can affect the flavor.

  • Jars: Invest in high-quality glass jars to keep your jelly safe and tasty.

  • Seal lids: Look for BPA-free lids to ensure they are safe for food storage.

  • Spices: Purchase whole spices and grind them for more intense flavor.

  • Herbs: If adding herbs, buy fresh ones for maximum aroma and taste.

  • Utensils: Use stainless steel or glass utensils to avoid reactions with acidic ingredients.

Dietary Considerations of cherry jelly recipe

Dietary Considerations of cherry jelly recipe

  • Cherry jelly is naturally gluten-free making it suitable for those with gluten sensitivities or celiac disease. You can enjoy this delightful treat without worrying about gluten contamination.

  • This jelly is low in fat since it mainly consists of fruit, sugar, and pectin. It's a guilt-free indulgence for those watching their fat intake.

  • For individuals managing their sugar intake, consider using sugar substitutes like stevia or erythritol to create a diabetic-friendly cherry jelly. This allows you to enjoy the sweetness without the spike in blood sugar levels.

  • If you are following a vegan lifestyle, ensure that the pectin you use is plant-based. Many brands offer vegan pectin options that can be used in this cherry jelly recipe.

  • Cherry jelly can be a part of a low-calorie diet. By opting for less sugar or sugar alternatives, you can significantly reduce the calorie count while still enjoying the fruity flavor.

  • This recipe can be made with organic cherries if you are looking for a more natural product. Organic fruits are grown without synthetic pesticides and fertilizers, making them a healthier choice.

  • For those who are mindful of additives and preservatives, making homemade cherry jelly ensures that you control the ingredients. This is a great way to enjoy a treat without unwanted chemicals.

  • Cherry jelly is rich in antioxidants, particularly anthocyanins found in cherries. These compounds can help combat oxidative stress and support overall health.

  • If you’re following a ketogenic or low-carb diet, consider adjusting the amount of sugar or using a low-carb sweetener to keep the carbohydrate count down while still enjoying this fruity spread.

  • For individuals with food allergies, cherry jelly is generally free from common allergens such as dairy, nuts, and eggs. However, always check the labels of any additional ingredients you use.

  • When making cherry jelly, you can incorporate spices like cinnamon or vanilla for added flavor without adding calories or sugar. This enhances the taste without compromising dietary goals.

  • This recipe is versatile, allowing you to pair it with various diets, including paleo or Whole30, as long as you choose compliant sweeteners and pectin.

  • Cherry jelly can be enjoyed in moderation as part of a balanced diet. It can elevate your meals and snacks without overwhelming your nutritional needs.

  • For those who are lactose intolerant or have dairy allergies, cherry jelly provides a perfect sweet alternative to cream-based spreads. It's a delightful addition to toast or desserts.

  • Lastly, homemade cherry jelly can be stored for long periods, making it a great way to preserve seasonal fruits and enjoy them year-round without artificial preservatives.

My Review On cherry jelly recipe

If you’re looking for a sweet and tangy treat, this cherry jelly recipe is a real winner! Bursting with the flavor of ripe cherries, it’s perfect for spreading on toast or adding to desserts. The recipe is straightforward, making it suitable for both beginners and experienced cooks. You'll start by pitting fresh cherries and simmering them to release their juices. A touch of sugar balances the tartness, while pectin ensures a perfect jelly consistency. The vibrant color and rich flavor of homemade cherry jelly will impress your family and friends. Plus, it’s a wonderful way to preserve summer’s bounty, allowing you to enjoy cherries all year round. The joy of making your own jelly is unmatched, and you can customize it with spices or citrus for an extra kick. Serve it at breakfast or use it in your favorite recipes for a delightful twist. Trust me, once you try this cherry jelly, you’ll never go back to store-bought!

Related Dishes of cherry jelly recipe

  • Carrot Cake: A spiced, moist cake topped with cream cheese frosting that pairs beautifully with the sweet-tart flavor of cherry jelly.

  • Classic Pound Cake: Dense and buttery, this cake serves as a perfect canvas for cherry jelly, enhancing its rich flavors.

  • Cheesecake: Creamy and rich, cheesecake topped with cherry jelly adds a delightful contrast in texture and sweetness.

  • French Toast: Golden and fluffy, drizzling cherry jelly over French toast creates a delicious breakfast treat.

  • Panna Cotta: This silky Italian dessert is elevated with cherry jelly, adding a fruity burst to each creamy bite.

  • Scones: Freshly baked scones with a dollop of cherry jelly make for a delightful afternoon tea experience.

  • Yogurt Parfait: Layering yogurt with granola and cherry jelly creates a refreshing and nutritious breakfast or snack.

  • Ice Cream: A scoop of vanilla ice cream topped with cherry jelly is a simple yet indulgent dessert.

  • Pancakes: Fluffy pancakes drizzled with cherry jelly offer a sweet twist to your morning routine.

  • Biscuits: Warm biscuits slathered with butter and cherry jelly present a comforting side dish for any meal.

Authoritative Cookbooks or Chefs of cherry jelly recipe

The Joy of Jams, Jellies, and Other Sweet Preserves

by Linda Ziedrich

Preserving with Pomona's Pectin

by Allison Carroll Duffy

Cultural and Historical Context of cherry jelly recipe

Cherry jelly has a rich history, dating back to ancient times when fruits were preserved to extend their shelf life. In many cultures, cherries were cherished not only for their delightful flavor but also for their medicinal properties. As home canning gained popularity in the 19th century, cherry jelly became a staple in American kitchens, especially during the summer months when cherries were in season. This vibrant jelly was often served at family gatherings and celebrations, symbolizing the bounty of the harvest and showcasing the art of preserving fruits for enjoyment throughout the year.

Frequently Asked Questions About cherry jelly recipe

What type of cherries are best for making jelly?

Sour cherries, like Montmorency, are ideal for jelly due to their tartness, which balances the sweetness of sugar. Sweet cherries can also be used but may require adjustments in sugar levels.

Do I need to pit the cherries before making jelly?

Yes, pitting the cherries is essential as the pits can impart a bitter flavor to the jelly. Use a cherry pitter for efficiency, or slice the cherries in half to remove the pits.

Can I use frozen cherries for jelly?

Absolutely! Frozen cherries work well for jelly. Just thaw them and drain any excess liquid before using. The flavor remains intact, making it a convenient option.

How do I know when my cherry jelly is ready?

To test if your jelly is ready, use the spoon test: dip a spoon into the mixture, let it cool for a moment, then run your finger through it. If it holds its shape and doesn't run back together, it's ready.

What can I use instead of pectin in cherry jelly?

You can use natural pectin sources like apples or citrus peels. Alternatively, reduce the jelly mixture longer to achieve a thicker consistency without commercial pectin.

How long can I store homemade cherry jelly?

Homemade cherry jelly can be stored in a cool, dark place for up to a year if properly sealed. Once opened, refrigerate and consume within a few weeks for the best flavor.

Can I reduce the sugar in cherry jelly recipes?

Yes, you can reduce sugar, but it may affect the jelly's texture and preservation. Use low-sugar pectin or adjust the recipe accordingly to maintain consistency.

What is the best way to sterilize jars for jelly?

To sterilize jars, wash them in hot, soapy water, then rinse. Place them in a boiling water bath for 10 minutes or run them through a dishwasher on the sterilize cycle.

Can I add spices to my cherry jelly?

Yes! Adding spices like cinnamon, cloves, or vanilla can enhance the flavor of cherry jelly. Add them during cooking and strain them out before canning for a subtle taste.

What should I do if my cherry jelly doesn't set?

If your jelly doesn't set, you can reheat it with additional pectin or sugar. Follow the instructions on the pectin package for guidance on reprocessing jelly.

Reviews of cherry jelly recipe

Emily Johnson

I made this cherry jelly for the first time and it turned out fantastic! The flavor is vibrant and the texture is perfect. I used fresh cherries from the farmer's market, which made all the difference. Definitely a keeper!

Michael Smith

This cherry jelly recipe was easy to follow. I appreciated the clear instructions. It set beautifully, and the taste is delightful. I used it on toast and in desserts. Will make again for sure!

Sarah Brown

I had a bit of trouble with the setting process, but the flavor of this cherry jelly is incredible! I think I might have rushed it. Next time, I’ll be more patient. Overall, a great recipe!

David Wilson

This cherry jelly recipe is a hit with my family! I followed it to the letter and it turned out perfectly. The sweetness is just right, and it pairs well with cheese. Will definitely make it again!

Linda Martinez

I loved making this cherry jelly! The color is stunning, and it tastes amazing. I used a mix of sweet and tart cherries for a unique flavor. It was a fun project and I can’t wait to share it with friends.

James Taylor

This recipe was good, but I found it a bit too sweet for my taste. I might reduce the sugar next time. The jelly set well, and the cherry flavor is nice. Overall, a solid recipe with room for tweaks.

Jessica Lee

I was pleasantly surprised by how easy this cherry jelly was to make! It turned out beautifully and tasted even better. I used it as a filling for pastries, and it was a hit at the brunch I hosted!

Robert Garcia

This cherry jelly is decent, but I had some issues with it not setting properly. I think my cherries were too juicy. The flavor is good, but I would recommend checking the pectin levels before starting.

Hi! I’m Jessica Lopez

Jessica Lopez is a passionate home cook, food enthusiast, and storyteller who believes that food is more than just nourishment—it’s an experience. Through her blog, she shares recipes, culinary adventures, and inspiration to help others explore new flavors and embrace the joy of cooking. Whether experimenting with ingredients, recreating family favorites, or discovering global cuisines, Jessica’s mission is to connect people through the art of food, one delicious dish at a time.