Deliciously Easy Panasonic Bread Maker Recipes You Need to Try Today!

Deliciously Easy Panasonic Bread Maker Recipes You Need to Try Today!

Written by Jessica Lopez

6 REVIEWS | 4.5 AVERAGE

Published at 05-01-2024

Edited on 04/02/2025 | 02:58 PM

Baked-Goods Recipes

Course: Breakfast

Cuisine: Various

Difficulty: Easy

Servings

10-12 slices

Prep Time

25 minutes

Cooking Time

3 hours

Total Time

3 hours 25 minutes

Fat

3g

Protein

7g

Carbs

45g

Calories

230 kcal

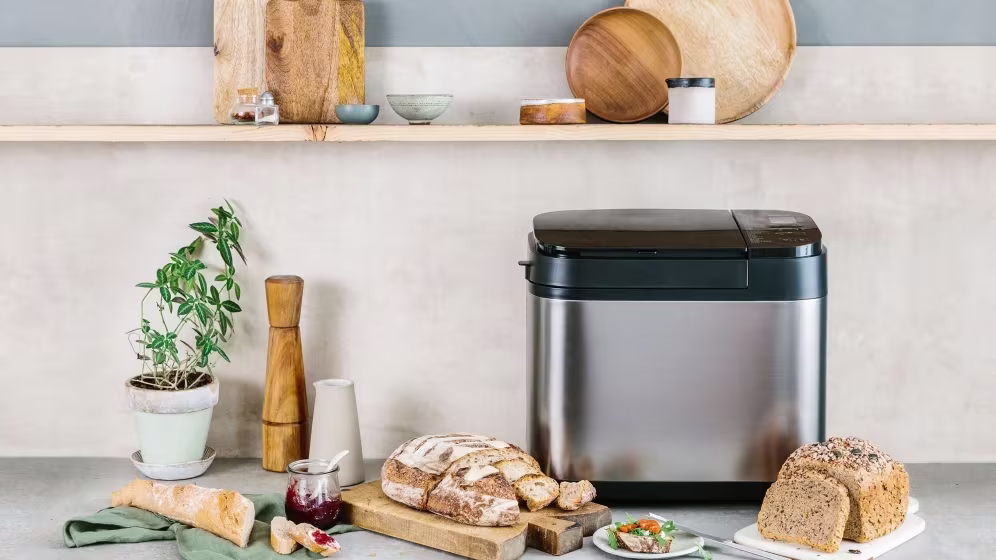
If you’re looking to elevate your home baking game, Panasonic bread maker recipes are a must-try! With the convenience of a bread maker, you can enjoy freshly baked bread without the hassle of kneading and rising. Perfect for both beginners and seasoned bakers, Panasonic bread makers allow you to experiment with various ingredients, flavors, and textures, ensuring that every loaf is uniquely yours. Imagine waking up to the scent of warm, homemade bread wafting through your home. The Panasonic bread maker takes the guesswork out of the process, making it easy to whip up everything from classic white bread to artisanal rye.

With programmable settings and a user-friendly interface, you can customize your baking experience to suit your family’s preferences. Whether you’re in the mood for a soft sandwich loaf, a crusty French baguette, or a sweet cinnamon swirl bread, there’s a recipe for every occasion. In this blog post, we’ll explore a selection of delightful Panasonic bread maker recipes that will inspire your culinary creativity. Each recipe is crafted to be not only delicious but also simple to follow, ensuring that you can achieve perfect results every time.

Plus, home-baked bread is free from preservatives and additives, making it a healthier choice for your family. So, dust off your Panasonic bread maker and get ready to fill your kitchen with the irresistible aroma of freshly baked bread. Let’s dive into the world of Panasonic bread maker recipes that will delight your taste buds and impress your loved ones!.

Essential Ingredients of panasonic bread maker recipes

  • Bread flour: 3 cups

  • Warm water: 1 1/4 cups

  • Active dry yeast: 2 teaspoons

  • Sugar: 2 tablespoons

  • Salt: 1 teaspoon

  • Olive oil: 2 tablespoons

Measurement Units of panasonic bread maker recipes

  • 500g bread flour

  • 300ml water

  • 7g instant yeast

  • 10g salt

  • 30ml olive oil

  • 10g sugar

Step by Step Instructions For panasonic bread maker recipes

Step by Step Instructions For panasonic bread maker recipes

  • Step - 1

    Prepare your Panasonic bread maker by placing it on a stable surface and plugging it in. Ensure that the baking pan is clean and dry before use.

  • Step - 2

    Gather all your ingredients for the bread recipe. Common ingredients include flour, water, yeast, salt, and sugar. Having everything ready will make the process smoother.

  • Step - 3

    Measure the ingredients accurately using a kitchen scale or measuring cups. Precision is key in bread-making, so follow the recipe closely for the best results.

  • Step - 4

    Add the liquid ingredients first into the bread pan. This typically includes water or milk, followed by oils or melted butter. Liquid ingredients need to be at the bottom to ensure proper mixing.

  • Step - 5

    Next, add the dry ingredients on top of the liquids. Start with the flour, then add the yeast, sugar, and salt. Make sure the yeast does not come into contact with the salt directly to prevent it from being activated too soon.

  • Step - 6

    If your recipe includes add-ins like nuts, seeds, or dried fruits, wait until the bread maker beeps to add these ingredients. This usually occurs during the kneading phase, allowing them to be evenly distributed.

  • Step - 7

    Select the appropriate baking program on your Panasonic bread maker. Options may vary, including settings for white bread, whole wheat, or gluten-free. Choose one that matches your ingredients.

  • Step - 8

    Set the timer if you wish to delay the start of the baking process. Many Panasonic models allow you to prepare your ingredients and set a timer for fresh bread at your preferred time.

  • Step - 9

    Once the program starts, allow the bread maker to knead, rise, and bake. Avoid opening the lid during this time, as it can disrupt the rising process.

  • Step - 10

    When the baking cycle is complete, carefully take out the bread pan using oven mitts. Let the bread cool in the pan for about 10 minutes before transferring it to a wire rack to cool completely.

Additional Notes of panasonic bread maker recipes

  • Always use room-temperature ingredients for a smoother batter and better yeast activation. Cold ingredients can slow down the rising process, resulting in denser bread.

  • Make sure to add the ingredients in the correct order as specified in your Panasonic bread maker's manual. Typically, liquids go in first, followed by dry ingredients, and yeast last to ensure proper mixing and rising.

  • Check the consistency of the dough during the kneading cycle. It should be slightly tacky but not overly sticky. If it’s too wet, add a little more flour; if it’s too dry, add a splash of water.

  • Avoid opening the lid during the baking process, as this can cause the bread to collapse. Trust the machine to do its job!

  • Experiment with different types of flour, such as whole wheat or rye, but remember to adjust the liquid content accordingly, as these flours absorb more moisture.

  • Clean your bread maker regularly to prevent any residue buildup that could affect the flavor of your bread.

Special Equipment of panasonic bread maker recipes

  • Panasonic bread maker

  • Measuring cups

  • Measuring spoons

  • Spatula

  • Cooling rack

Expert Chef Tips of panasonic bread maker recipes

  • Experiment with different flours like whole wheat or rye for unique flavors.

  • Always measure ingredients accurately, as precision is key in bread making.

  • Let the dough rise in a warm place to achieve the best texture.

  • Add herbs or spices to the dough for an aromatic twist.

  • Use fresh yeast for optimal rising and flavor development.

  • Don’t rush the cooling process; allow your bread to rest for at least an hour.

  • Consider adding seeds or nuts to enhance nutrition and crunch.

  • Use the delay timer for fresh bread in the morning.

  • Try adding a tablespoon of vinegar for improved shelf life and texture.

  • Clean your bread maker thoroughly after each use to maintain its performance.

Ingredient Sourcing and Quality Tips of panasonic bread maker recipes

  • Flour: Choose organic, unbleached all-purpose flour for the best results.

  • Yeast: Opt for fresh, high-quality yeast for reliable rise.

  • Water: Use filtered water to avoid impurities that can affect taste.

  • Salt: Sea salt adds flavor and enhances the bread's texture.

  • Sugar: Select raw or organic sugar for a touch of sweetness.

  • Butter: European-style butter provides richness and flavor.

  • Milk: Use whole milk or buttermilk for added moisture and taste.

  • Eggs: Fresh, free-range eggs add richness and improve structure.

  • Seeds: Go for high-quality, raw seeds for added nutrition.

  • Herbs: Use fresh herbs for vibrant flavor and aroma.

Dietary Considerations of panasonic bread maker recipes

Dietary Considerations of panasonic bread maker recipes

  • Gluten-Free: For those with gluten intolerance or celiac disease, Panasonic bread makers can easily accommodate gluten-free flour blends. Use a mix that includes xanthan gum to replicate the elasticity of gluten.

  • Whole Grain: Incorporating whole grains like whole wheat or spelt flour can enhance the nutritional value of your bread. Whole grains provide more fiber, vitamins, and minerals compared to refined flours.

  • Low-Carb: For a low-carb option, consider using almond flour or coconut flour. These alternatives are great for those following ketogenic or low-carb diets while still allowing for delicious homemade bread.

  • Dairy-Free: If you are lactose intolerant or following a dairy-free diet, substitute milk with almond milk, oat milk, or water. Additionally, use dairy-free margarine or coconut oil instead of butter.

  • Nut-Free: For individuals with nut allergies, you can easily modify recipes by avoiding nut-based flours and using seeds like sunflower or pumpkin seeds for added flavor and crunch.

  • Sugar-Free: Reduce sugar intake by using natural sweeteners like honey, maple syrup, or stevia. These options can provide sweetness without the refined sugar spike.

  • Vegan: To create a vegan-friendly bread, simply replace eggs with flaxseed meal mixed with water or applesauce. Use plant-based milk and oils to keep your bread free from animal products.

  • Low-Sodium: If you are watching your sodium intake, try using low-sodium alternatives for salt, or omit it altogether. Herbs and spices can add flavor without the extra sodium.

  • Yeast-Free: For those who prefer not to use yeast, consider baking bread with baking powder or baking soda. These leavening agents can create a denser bread alternative.

  • Fiber-Rich: Enhance your bread's fiber content by adding ingredients like oats, chia seeds, or psyllium husk. These additions can aid digestion and promote a feeling of fullness.

  • Protein-Packed: To increase the protein content, incorporate protein-rich ingredients such as Greek yogurt, protein powder, or legumes into your bread recipe.

  • Paleo-Friendly: For a paleo diet, stick to using almond flour, coconut flour, or cassava flour. Avoid grains and processed sugars to create a wholesome, natural bread.

  • Low-FODMAP: If you are following a low-FODMAP diet, be mindful of the ingredients you choose. Use gluten-free flour and avoid high-FODMAP additives like certain sweeteners.

  • Allergy-Friendly: Customize your bread to be allergy-friendly by avoiding common allergens such as wheat, dairy, eggs, and nuts. Use alternative ingredients that suit your dietary needs.

  • Kid-Friendly: Make your bread appealing to kids by adding fun mix-ins like chocolate chips, dried fruits, or colorful seeds. This can turn a healthy loaf into a delightful treat.

My Review On panasonic bread maker recipes

If you're searching for reliable and delicious Panasonic bread maker recipes, you're in for a treat! The Panasonic bread maker is an incredible kitchen tool that simplifies the bread-making process while delivering bakery-quality results. From classic white bread to whole grain loaves, the versatility is impressive. One standout recipe is the 'Cinnamon Raisin Bread,' which features a perfect balance of sweet and spice, making it ideal for breakfast or a snack. Another favorite is the 'Herb Focaccia,' bursting with fresh flavors and perfect for dipping in olive oil. The best part? Most recipes are beginner-friendly, requiring minimal hands-on time. You can enjoy the aroma of freshly baked bread wafting through your home without all the fuss. Plus, these recipes often include gluten-free options, catering to various dietary needs. With Panasonic's bread maker, baking bread becomes a joyous, effortless experience that brings your family together around the table.

Related Dishes of panasonic bread maker recipes

  • Garlic Herb Focaccia: This fluffy Italian bread is infused with garlic and fresh herbs, making it a delightful companion to any meal.

  • Cinnamon Raisin Bread: A sweet and cozy loaf filled with plump raisins and a swirl of cinnamon, perfect for breakfast or a snack.

  • Honey Oat Bread: Nutty and slightly sweet, this bread is a wholesome choice that pairs beautifully with butter or jam.

  • Cheddar Jalapeño Bread: A savory loaf with a kick, this bread combines sharp cheddar and spicy jalapeños for a flavorful treat.

  • Banana Bread: Moist and rich, this classic quick bread is made with ripe bananas and is perfect for a sweet indulgence.

  • Whole Wheat Bread: Nutritious and hearty, this bread is a great source of fiber and pairs well with any topping.

  • Pumpkin Bread: A seasonal favorite, this spiced loaf is made with pumpkin puree and is perfect for fall gatherings.

  • Zucchini Bread: A moist and flavorful loaf that incorporates grated zucchini, making it a great way to sneak in some veggies.

Authoritative Cookbooks or Chefs of panasonic bread maker recipes

The Bread Baker's Apprentice

by Peter Reinhart

Bread: A Baker's Book of Techniques and Recipes

by Jeffrey Hamelman

Artisan Bread in Five Minutes a Day

by Jeff Hertzberg and Zoë François

The New Artisan Bread in Five Minutes a Day

by Jeff Hertzberg and Zoë François

The Bread Bible

by Rose Levy Beranbaum

Cultural and Historical Context of panasonic bread maker recipes

The invention of bread makers in the late 20th century revolutionized home baking. Panasonic was one of the pioneers in this technology, making it easier for families to enjoy fresh, homemade bread without the hassle of traditional baking methods. This innovation democratized the art of bread making, allowing people from various backgrounds to explore different types of bread from around the world in the comfort of their own kitchens. Today, Panasonic bread maker recipes allow bakers to connect with their heritage through recipes passed down through generations while also experimenting with modern flavors and techniques.

Frequently Asked Questions About panasonic bread maker recipes

What types of bread can I make with a Panasonic bread maker?

You can make a variety of breads including white, whole wheat, gluten-free, sourdough, and even specialty breads like brioche and focaccia. The Panasonic bread maker offers different settings to accommodate these recipes, ensuring perfect results every time.

How do I adjust recipes for a Panasonic bread maker?

When adjusting recipes, consider the bread maker's capacity and settings. Use the recommended flour-to-water ratio, typically 3:1 for bread. Also, adjust yeast and salt according to the recipe's scale, and always add ingredients in the order specified by the machine.

Can I use whole grain flour in my Panasonic bread maker?

Yes, you can use whole grain flour! Panasonic bread makers have specific settings for whole wheat bread, which adjusts the kneading and rising times to accommodate the denser texture of whole grain flours, ensuring a well-risen loaf.

What is the best yeast to use in a Panasonic bread maker?

Instant yeast or bread machine yeast is best for Panasonic bread makers. These yeasts are designed to work well with the machine's settings, providing a reliable rise and consistent texture without the need for proofing.

How do I clean my Panasonic bread maker?

To clean your Panasonic bread maker, unplug it and let it cool. Remove the bread pan and kneading blade, then wash them in warm, soapy water. Wipe the interior with a damp cloth, avoiding harsh chemicals. Ensure everything is dry before reassembling.

Can I make jam in my Panasonic bread maker?

Yes, many Panasonic bread makers have a jam setting. You can make fruit preserves by combining fruit, sugar, and lemon juice. Follow the specific instructions in your manual for timing and ingredient ratios to achieve the best results.

What should I do if my bread is too dense?

If your bread is too dense, check your ingredient measurements, especially flour and yeast. Ensure you're using the correct flour type and that your yeast is fresh. Also, consider adjusting the kneading time or adding a bit more liquid to the dough.

How long does it take to bake bread in a Panasonic bread maker?

Baking time varies by recipe and setting, but typically, it takes between 2 to 4 hours. The machine's timer will indicate the total time, including kneading, rising, and baking, allowing you to plan accordingly for fresh bread.

Can I make gluten-free bread in a Panasonic bread maker?

Absolutely! Panasonic bread makers have a gluten-free setting. Use gluten-free flour blends and follow specific gluten-free recipes to ensure proper texture and rise, as gluten-free dough behaves differently than traditional dough.

What is the best way to store homemade bread?

To store homemade bread, let it cool completely, then wrap it in plastic wrap or aluminum foil. For longer storage, slice and freeze the bread in an airtight container. This preserves freshness and prevents staleness for up to three months.

Reviews of panasonic bread maker recipes

Emily Johnson

I tried the whole wheat bread recipe and it turned out amazing! The texture was perfect and it rose beautifully. My family loved it, and I felt great serving them homemade bread. Definitely a keeper for my Panasonic bread maker!

Michael Smith

The gluten-free bread recipe was a game changer for me. It was moist and flavorful, unlike any store-bought version. I appreciate how easy it was to follow the instructions. Highly recommend for anyone with dietary restrictions!

Sarah Williams

I made the classic white bread and it was a hit at our family gathering! The crust was golden and the inside was soft. I love how my Panasonic bread maker does all the work. Will definitely try more recipes soon!

David Brown

I attempted the cinnamon raisin bread and while it was tasty, I found it a bit dense. I might have overmixed it. Still, the flavor was delightful, and my kids devoured it. I’ll adjust my technique next time!

Laura Davis

The sourdough recipe was surprisingly easy to follow! I was nervous about the process, but the Panasonic made it foolproof. The bread had a lovely tang and crust. I’m so proud of my first attempt at sourdough!

James Wilson

I made the pizza dough recipe, and it was fantastic! The dough rose perfectly and was easy to work with. My homemade pizzas turned out delicious. I love how versatile my Panasonic bread maker is for different recipes!

Hi! I’m Jessica Lopez

Jessica Lopez is a passionate home cook, food enthusiast, and storyteller who believes that food is more than just nourishment—it’s an experience. Through her blog, she shares recipes, culinary adventures, and inspiration to help others explore new flavors and embrace the joy of cooking. Whether experimenting with ingredients, recreating family favorites, or discovering global cuisines, Jessica’s mission is to connect people through the art of food, one delicious dish at a time.